
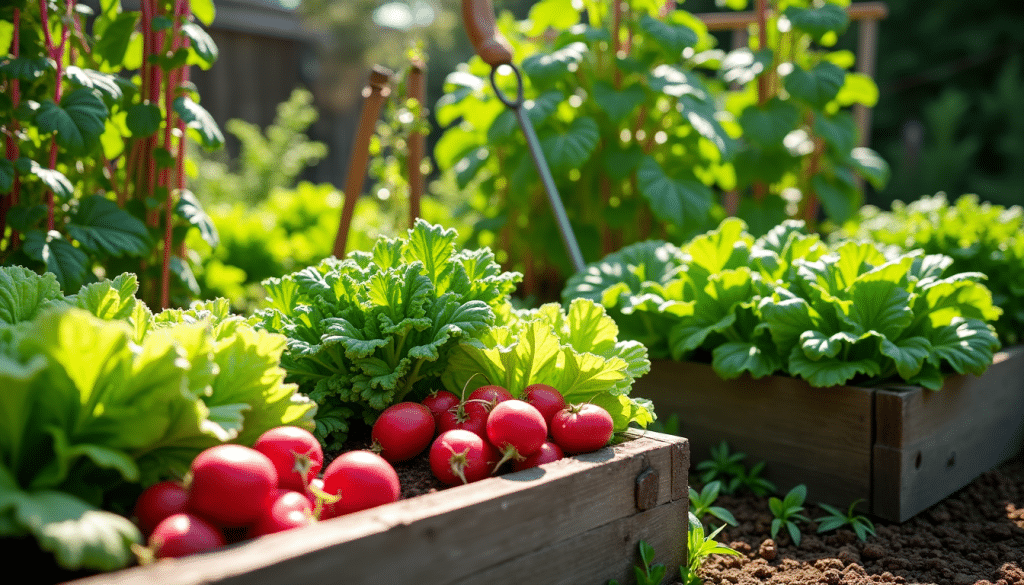

I still vividly remember my first harvest from my own garden — the satisfaction of picking homegrown vegetables after just 4–6 weeks! Growing vegetables for beginners mainly requires patience and curiosity. Radishes taught me that some vegetables grow surprisingly fast — within two weeks you can already see the first seedlings emerge.
Over the years I’ve discovered that many vegetables are easy to care for. Take Swiss chard, for example, a dependable vegetable that provides harvests year-round with minimal attention. In my experience arugula also grows without problems and can be grown almost year-round.
What I love most are plants like salanova lettuce, from which you can keep harvesting for months. For this list I have selected 15 vegetables that even beginning gardeners can successfully grow. Whether you have a modest balcony or a spacious garden, these vegetables will give you a flying start. Remember that every gardener once started as a beginner — the most important thing is to just begin and learn from your experiences.
Head lettuce: The foundation for every vegetable garden
Image source: Libelle
Head lettuce was my first success as a beginning gardener. This classic vegetable taught me that patience pays off — within 8 to 12 weeks you can already harvest your first head [3].
Head lettuce varieties for beginners
From my experience, some varieties are better suited for beginners than others. ‘Appia’ has never disappointed me with its tender, yellow-green heads [17]. I prefer the ‘Dikke Blonde Traagschietende’ for summer cultivation because it stays harvestable longer without bolting [17]. For early spring cultivation I always choose the reliable ‘Meikoningin’ [17].
Care and watering
Through trial and error I have learned that humus-rich soil is essential for success [17]. Don’t forget that lettuce is 95% water — a fact I remind myself of daily when watering. When growing in pots I’m extra vigilant during dry periods [14]. My heading lettuce grows best in locations with at least 4 hours of sunlight per day [5].
Protection against slugs
Slugs have been my biggest challenge — a single slug can produce up to 600 eggs a year [4]! After years of experimenting I have found that natural barriers work best. Sprinkling cocoa shells, crushed shells or coffee grounds around the plants keeps these voracious visitors at bay [4]. I also always plant some mint or fennel among my lettuce, because slugs dislike these strong smells [4]. For extra protection I use slug collars — those plastic pots with an inverted rim are a real boon for protecting young seedlings [17].
Cut-and-come-again lettuce: Harvesting continuously for months
My first encounter with cut-and-come-again lettuce was a revelation! Unlike its cousin the head lettuce, this type forms loose, graceful leaves with a beautifully curled structure [5]. I have found that cut-and-come-again lettuce is perfect for beginners — it keeps producing new leaves for months.
Cut-and-come-again lettuce growing basics
In my vegetable garden I give cut-and-come-again lettuce a 30×30 cm patch with rich, airy soil. It requires at least 4 hours of sunlight per day [18]. From experience I know that sowing between March and May yields the best results for a plentiful harvest from June to August [5]. I’m still amazed at how hardy this vegetable is — in my greenhouse it withstands temperatures down to -10 degrees [19]!
For optimal growth I have found these conditions crucial:
- Consistent watering, preferably in the cool of the morning or the calm of the evening
- Airy, nutrient-rich soil that retains moisture
- Extra protection against drying out during hot summer days
Harvesting techniques for longer yields
The art of harvesting I learned by trial and error. I start as soon as the outer leaves are about 10 cm long [18]. With a gentle hand I pull the outer leaves outward and cut them at the base [5]. The heart of the plant is sacred – that’s where the new leaves that still need to grow are hidden [5].
By refining this technique, I can now harvest from the same plant for up to three months [20]! Patience really pays off with cut-and-come-again lettuce. By harvesting regularly you prevent the plant from bolting [5]. Fresh leaves taste best straight from the garden, but if necessary, I store them for one day in the refrigerator, lovingly wrapped in damp kitchen paper [5].
Radishes: Quick Satisfaction
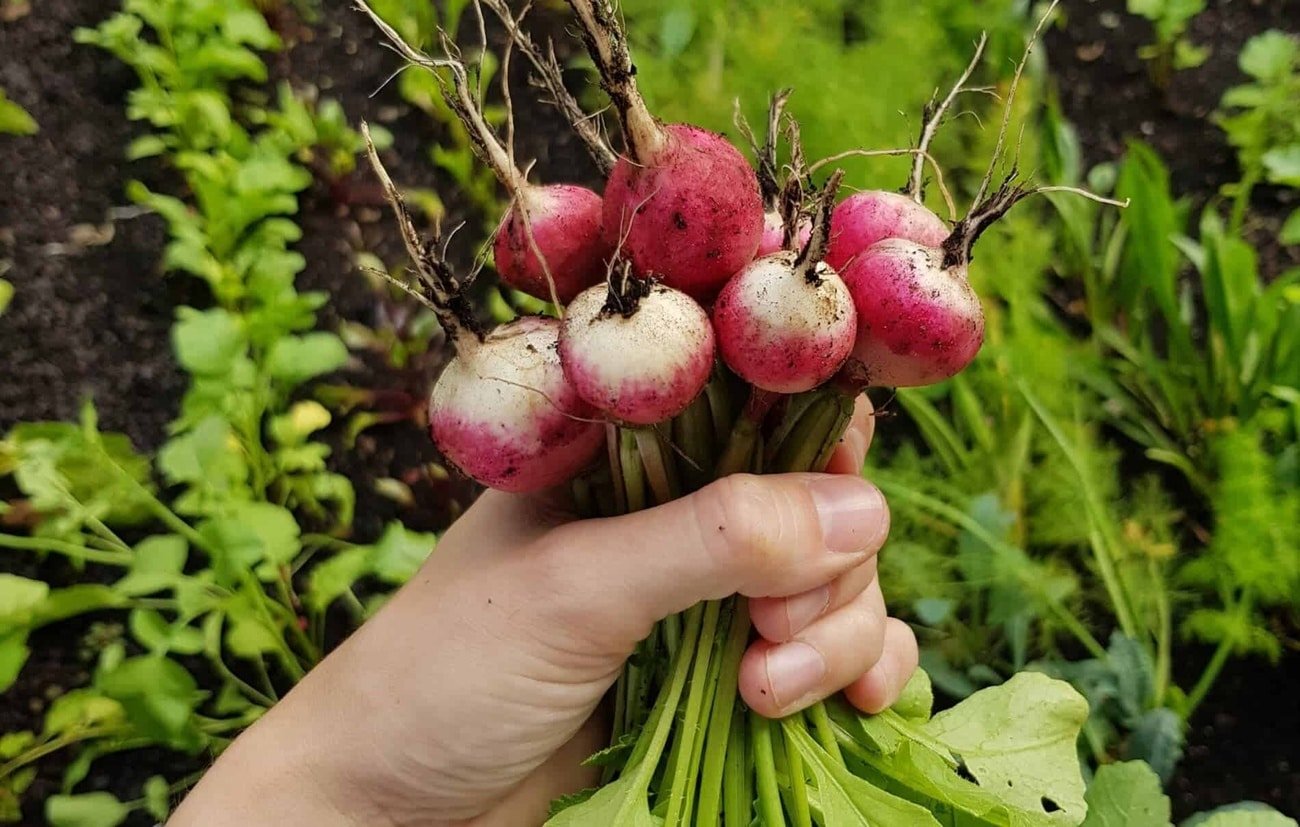
Image Source: Miljuschka
Radishes gave me, as a beginner gardener, the confidence I needed. These peppery little tubers are a rewarding choice – they grow so quickly that you can already harvest within 4 to 6 weeks [21]. Patience really pays off with these little red gems!
Sowing and caring for radishes
Over the years I’ve learned that the best sowing period runs from March to July. I also like to sow in early spring and in August for a lovely late crop [21]. From my experience these conditions are crucial for success:
- I always sow at a depth of 1 cm with 3-5 cm spacing [21]
- A sunny spot works perfectly in spring and autumn [21]
- Don’t forget to water regularly in dry weather [21]
- I use light, low-nutrient soil – they don’t like rich soil [21]
I’m always surprised how well radishes thrive in cooler conditions. In warm summer months I choose a spot in partial shade – they cope poorly with the combination of heat and dryness [21].
Harvesting and storing
In summer I usually harvest my radishes after just 4 weeks, while in autumn they need a bit more time [21]. It always gives me satisfaction to gently pull them from the soil as soon as they are about 2 cm thick [21]. Right after harvesting I remove the foliage – an important lesson I learned early on [21].
Fresh radishes taste best, but sometimes I have too many at once. Then I put them in a bowl of water in the refrigerator, where they stay crisp for a week [21]. I never throw away the greens – they become a delicious pesto or a zesty addition to salads [21]. Happy gardening!
Swiss chard: Decorative and Flavorful

Image Source: Women’s Health
Swiss chard has completely transformed my vegetable garden with its majestic, colorful stalks and lush leaves. This versatile vegetable not only brings beauty, but also surprises with a unique flavor that combines the best of spinach and beetroot [4].
Choosing Swiss chard varieties
In my garden I enjoy experimenting with different varieties:
- Bright Lights: My absolute favorite – an enchanting rainbow mix with five colors that bring my vegetable garden to life – red, pink, purple, yellow and white [12]
- Lucullus: I choose this for its incredibly soft, tender leaves with elegant light green stems [12]
- Rhubarb Chard: A real eye-catcher in my garden with its dramatic deep-red stems and veins [12]
Care tips
From experience, chard thrives best in a sunny or partly shaded spot, well protected from cold winds and heavy rain [4]. I have learned that this deep-rooting beauty needs a rich, humus-rich soil to truly flourish [4]. My weekly routine consists of giving 2-3 centimeters of water, of course adjusted to the weather [7].
For optimal growth I keep a spacing of 20 to 30 centimeters between plants [4]. Mulching with compost, straw or leaves is one of my secret weapons to retain moisture [7]. Patience truly pays off with chard!
Successive harvesting techniques
I start harvesting as soon as the young leaves are large enough, usually around late May [5]. The heart of the plant is sacred – I only pick the outer leaves and leave the center intact for new growth [5]. With this technique I often harvest well into November, and in mild winters even longer [5].
Fresh chard tastes best on the same day. Have to store it? Then wrap the leaves in a sealed bag and keep them for up to two days in the refrigerator [4]. Happy gardening!
Bush tomatoes: Compact and Productive
Image Source: Gardeners World
Bush tomatoes have stolen my heart as a compact vegetable wonder. These modest plants, which only reach 50 to 80 centimeters in height [14], are perfect for my small city garden.
Bush tomatoes for beginners
The beauty of this tomato variety is that it develops more in width than in height [3]. I have found that bush tomatoes require much less maintenance than indeterminate (cordon) tomatoes – no fuss with removing suckers [15]! For my fellow beginners I recommend the compact dwarf bushes, 30–45 cm tall. These little powerhouses produce surprisingly many sweet cherry tomatoes [16].
Care and watering
Through trial and error I have learned that bush tomatoes are thirsty plants. Curling leaves are their cry for water [3]. An important lesson: water at the base of the plant, never on the leaves [14]. My bush tomatoes thrive best in a sunny, sheltered spot with at least 8 hours of sunlight per day [14].
For optimal growth I follow these guidelines:
- Rich, airy soil is the foundation for success
- A little extra feeding every 4–5 weeks works wonders [16]
- Once the fruits appear, I provide light support [15]
Disease prevention
Unfortunately tomato plants are susceptible to fungal diseases, especially in humid summers [3]. After years of experimenting I have gathered these prevention tips:
- Remove lower leaves before they touch the damp soil [3]
- Give the plants room to breathe for good air circulation [17]
- Treat preventively with my favorite natural ally: nettle manure [17]
For faster-ripening tomatoes I trim away excess leaves around the fruit. Toward the end of the season I remove new flower clusters – they won’t ripen anymore [14]. Happy gardening!
Potatoes in Bags
Image Source: Gardeners World
Through trial and error I learned that growing potatoes is much easier than it seems. With a simple grow bag or a large pot I can even turn my modest balcony into a productive potato patch.
Growing potatoes in limited space
A grow bag of at least 30 liters proves to be the perfect size for my potato experiments [5]. From experience I know that early and mid-early varieties do well with 2-3 potatoes per bag, while late varieties require more space – in that case I plant at most 1-2 per bag [4]. Don’t forget to make drainage holes in the bottom – a lesson I learned the hard way [5].
Hilling and care
It all starts by filling the bag one third with potting soil [18]. I plant the pre-sprouted potatoes 10-15 cm above the bottom [19]. Watering requires attention – not too wet, not too dry. At planting I give plenty of water, then every two weeks, and weekly during heatwaves [20].
The best moment comes when the stems are 15 cm high – that’s when hilling begins [21]. I repeat this ritual two to three times, always with 3-4 weeks in between [21]. Hilling protects the tubers from greening caused by sunlight [4].
Harvest timing
After about 10 weeks the first early potatoes can already be harvested [4]. I always wait until the foliage turns yellow and withers – the unmistakable sign that harvest is near [7]. With a handy resealable flap in the bag I harvest exactly what I need [5]. The reward? A yield of 2.5 to as much as 5 kilos per bag, depending on the variety chosen [8]. Patience really pays off with potatoes!
Arugula: Spicy Leafy Green

Image Source: Groei & Bloei
Arugula was my first love in the vegetable garden. This spicy leafy green surprised me with its simplicity and quick results. Within 3 to 4 weeks in summer I already harvest the first tender leaves for my salads and pizzas [22].
Arugula growing basics
After years of experimenting I’ve found that this versatile plant feels at home in both full sun and partial shade [23]. For success I’ve found these conditions indispensable:
- Loose, nutrient-rich soil that drains well
- Moist but not waterlogged soil
- Sow between March and October for best results [24]
- Give the seedlings 15 cm spacing between the rows to breathe [25]
I’m still surprised that arugula grows year-round in my greenhouse [24]. Through trial and error I’ve learned to mix some sand into the soil — this prevents waterlogged roots [24]. Don’t forget to water regularly, otherwise the leaves will droop sadly [22].
Continuous harvesting for fresh leaves
My favorite moment is when the leaves are 10 cm long — that’s when the harvest celebration begins [26]. The secret is in the cutting: a few centimeters above the ground, respecting the plant’s crown [27]. With this technique my arugula keeps producing new leaves for weeks [28].
The young leaves have a delicate, aromatic flavor that surprises me every time [27]. Over time they become firmer and spicier — perfect for those who like a bit more character [27]. I prefer to use them straight from the garden, but they also stay crisp and fresh for several days in the vegetable drawer of the fridge [27]. Happy planting!
Oriental Leafy Greens Mix
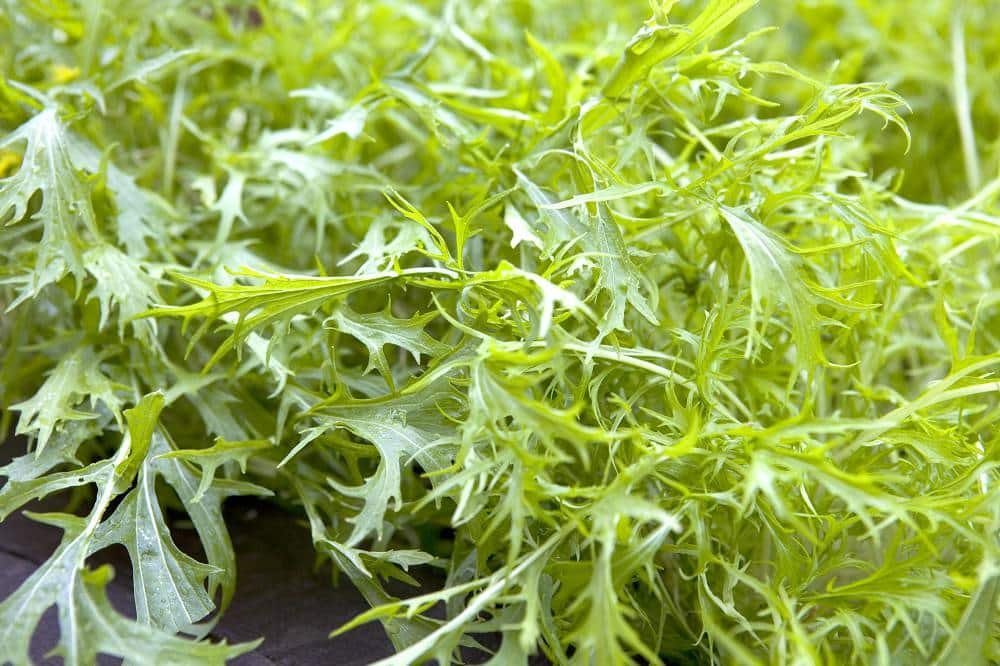
Image Source: Gardeners World
My journey of discovery with Asian leafy greens has completely transformed my vegetable patch. This fast-growing mix surprises me time and again — within a few weeks I can already harvest a colorful palette of flavors [29].
Mizuna and other Asian greens
In my garden I enjoy experimenting with a lively mix of mizuna, tatsoi, pak choi and mustard greens [6]. Each variety brings its own character — from mild to spicy — perfect for my favorite stir-fries and refreshing salads [29]. What I love most is that these crops are ideal for beginners like I once was. They require little attention but reward you richly with an explosion of flavors, colors and textures [30].
Care tips
Over the years I’ve learned that sowing between March and August gives the best results [6]. For healthy growth I maintain these plant spacings:
- Mustard greens need 25×25 cm of space
- Tatsoi thrives at 20×20 cm
- Pak choi needs 30×30 cm to flourish [6]
These Asian beauties like a spot with adequate sunlight, but I protect them from the midday sun during hot summer days [31]. Spring is my favorite season – the cooler temperatures naturally keep diseases and pests at bay [6].
Harvesting methods
I start harvesting as soon as the leaves are mature. For mustard greens I wait until they are 15-20 cm tall [6]. From experience I know that harvesting in the cool of the day and chilling them immediately keeps the vegetables fresh for about a week [6]. But to be honest – freshly picked leaves simply taste the best [29]. Happy planting!
Zucchini: Beginner-friendly
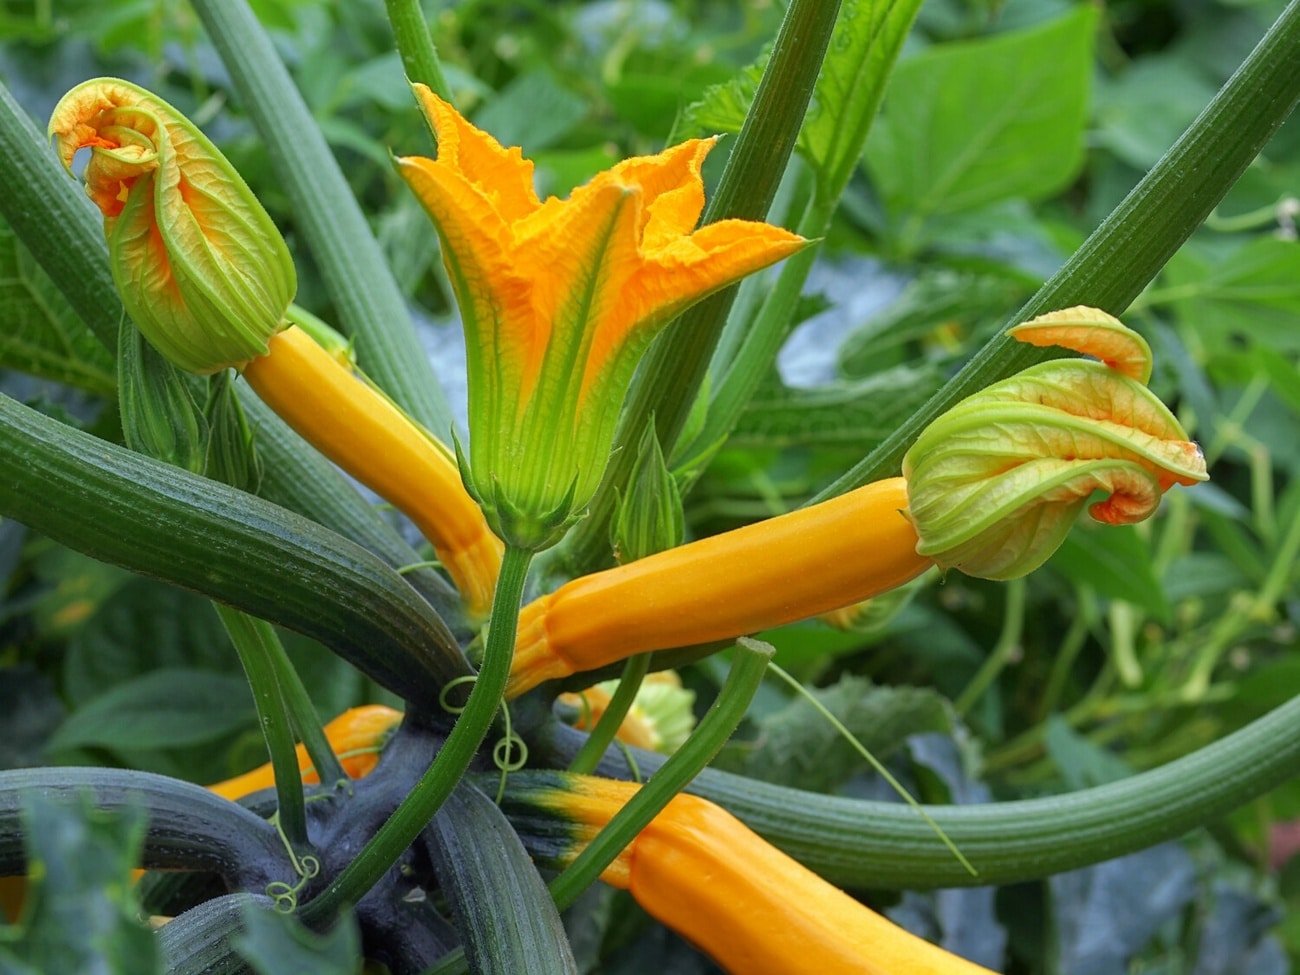
Image Source: Tuinadvies
Zucchinis have taught me that patience and attention are richly rewarded. A single plant in my garden can produce 25 to 30 zucchinis in one season – a true abundance [9]!
Choosing zucchini varieties
Over the years I have discovered several tasty varieties:
- ‘Zucchini’: My first love, a reliable light green classic
- ‘Black Beauty’: Perfect for my well-manured vegetable patch
- ‘Ola Escaladora’: A surprising climber that grows vertically [9]
I’m still amazed at how much variation there is, like the elegant cream-white ‘Libanese white bush’ and the playful striped ‘Cocozelle’ [32].
Care for maximum yield
From experience I know that zucchinis love a sunny, warm spot with at least 6-8 hours of sunlight per day [9]. I give them plenty of space – 50 to 75 cm between plants [33]. In my city garden they grow surprisingly well in a large pot or grow bag of 40 cm diameter [33].
The nicest thing, I find, is how quickly the fruits grow on warm summer days [33]. I harvest them young and tender, at a length of 15-20 cm [9]. By picking regularly I encourage the plant to produce new flowers and fruits [9].
An important lesson I learned: prevent powdery mildew by giving the plants enough space [9]. I water at the base of the plant and ensure a well-aerated soil that doesn’t form puddles [9]. Patience really pays off with zucchinis!
Broad beans: Early starter
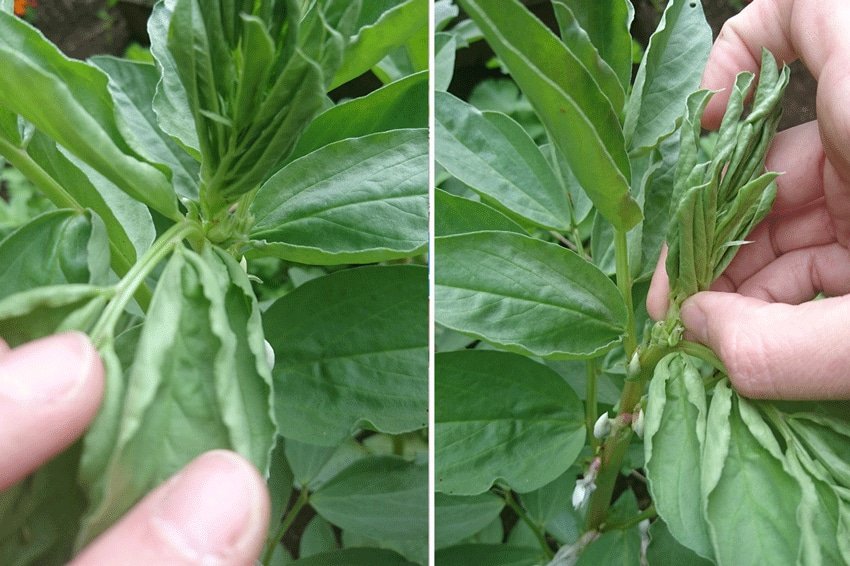
Image Source: Stadstuinieren
Broad beans taught me that the gardening season starts earlier than you think. These robust legumes were my first success in late winter — they can be planted outdoors from February and cheerfully defy the cold [34].
Growing broad beans for beginners
Through trial and error I discovered three proven sowing methods. My favorite approach is to pre-sow from the end of January under glass at a minimum of 5 degrees [34]. If the weather permits, I sow directly outdoors from mid-February [34]. I’m still surprised there’s a third option few gardeners know about: sowing in October [35].
For pre-sowing I use ordinary pots with general potting soil. I press the seeds gently 2–3 cm deep [34]. An important lesson I learned the hard way: put the seedlings straight into the light, otherwise they become long and weak, and susceptible to all kinds of problems [34].
Protection against aphids
My biggest challenge? The notorious black bean aphid [35]. After years of experimenting I learned to stay ahead of this pest. As soon as I spot the first aphid, I cut off the tender tips immediately [34]. These juicy growing points are a direct invitation to aphids.
The secret to successful broad beans is timing. By sowing early I often harvest before the aphids become active [35]. If they do attack, I have a tried-and-true recipe: mix 2 tablespoons of vegetable oil and 2 tablespoons of green soap in 1 liter of warm water [36]. Patience really pays off with broad beans!
Spinach: Vitamin powerhouse
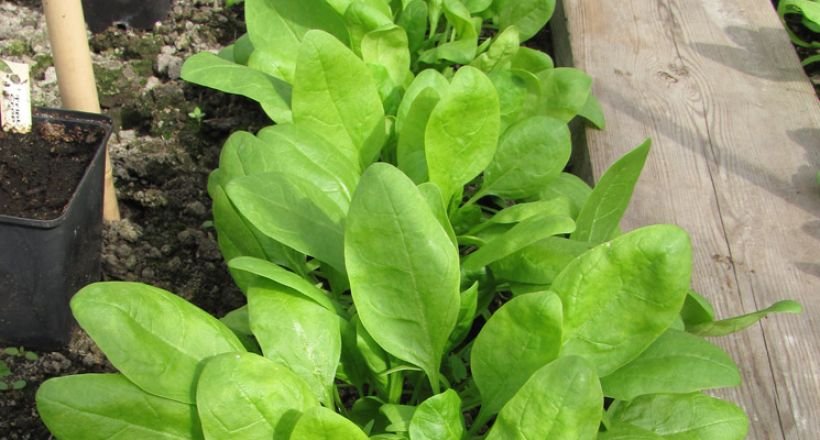
Image source: Groei & Bloei
Spinach has taught me that some humble vegetables are true nutritional powerhouses. This unassuming leafy green is packed with vitamins A, K and folate [37]. I’m always amazed at how many minerals are in these leaves — from potassium to magnesium and iron [37].
Growing spinach per season
Through trial and error I’ve discovered that you can sow spinach outdoors as early as February [38]. From my experience, the following conditions are indispensable for success:
- Loose, fine soil without competing weeds [38]
- Rich feeding with well-rotted farmyard manure — a real game changer [38]
- Plant seedlings 15 centimeters apart in the row — they need space [38]
- In cold weather I protect them with horticultural fleece — they’re a bit tender [38]
The great thing about spinach is that it fits perfectly into spring and autumn [38]. I usually sow between early March and late April, and then again from late July to late August [38]. In summer you need to be extra careful — it bolts easily then [38].
Harvest tips for fresh leaves
The harvest begins once the leaves are fully grown. With sharp scissors or careful fingers I pick leaf by leaf [38]. The heart of the plant is sacred — that’s where the new leaves that still need to grow are hidden [38].
For optimal freshness I store my spinach in a sealed bag or salad spinner in the refrigerator [38]. Don’t forget to wash it thoroughly – there is often some soil hidden between the leaves [38]. Spinach tastes best straight from the garden; that’s when you really notice the difference [38]. Happy gardening!
Peas: A Vertical Vegetable
Peas have taught me that height is a gift in the vegetable garden. These graceful climbers effortlessly reach up to 180 cm toward the sky, while hardly taking up any precious garden space [39]. Pure magic!
Pea growing basics
My first failed pea harvest taught me the importance of timing. Now I sow between March and April for the best results [11]. Sometimes I can’t curb my impatience and start pre-sowing in potting soil as early as mid-February [11]. The seeds are placed 2-3 cm deep in the soil, with 3-5 cm of breathing room between them [40]. A hard lesson I learned: protect those young plants from hungry birds and mice with mesh or plastic [40].
Climbing support options
Through trial and error I discovered that sturdy climbing support is indispensable. These options work best for me:
- Mesh or netting for the tendrils to lovingly wind around
- Bamboo poles arranged in an elegant wigwam shape
- Twine stretched horizontally between posts – my personal favorite [11]
The secret? Put the support in place while the plants are still small [10]. The delicate tendrils attach much more easily to thin materials [41].
Harvest timing
The best moment comes when the pods flatten and you can see the first contours of peas [42]. I pick at least twice a week – regularity is the key to success [11]. By harvesting consistently you encourage the plant to produce new flowers and pods [41]. I store fresh pods for a maximum of 3-5 days in the refrigerator, but to be honest – they’re best straight from the garden [11]. Happy planting!
Beets: Colorful Tubers
Image Source: Gardeners World
Beets have transformed my vegetable garden with their surprising palette of colors. Besides the classic red beets, I discovered beautiful yellow, white and even striped varieties [43]. I’m always amazed at how many nutrients these tubers contain – from proteins to vitamin C, potassium, magnesium and folic acid [2].
Beet varieties for beginners
Over the years I’ve become familiar with several tasty varieties:
- Chioggia: My absolute favorite with its enchanting red-and-white rings and sweet flavor [44]
- Boldor: A golden surprise in the vegetable garden [45]
- Detroit Dark Red: The reliable classic with its deep red color [46]
- Cylindra: Perfect for those who like neatly sliced rounds [47]
Care and harvesting tips
From experience I know that beets love humus-rich, well-draining soil [2]. Sowing time runs from mid-April to early July for a delicious harvest in August and September [48]. I always keep 25 centimeters between the rows, with 8 centimeters between the plants – they really need that space [2].
The secret to success? Consistent watering! The soil especially needs to stay nice and moist during the germination phase [2]. After about three to four months comes the most exciting moment – the first harvest [2]! Pull them gently from the ground when they reach the size of a tangerine [49].
In my cool cellar the roots keep well for up to five months [2]. For shorter storage I wrap them in a cloth in the refrigerator, where they are good for about four weeks [2]. An important lesson I learned: young roots have much more flavor than their older brothers and sisters [2]. Happy planting!
Tuscan kale: Winter-hardy
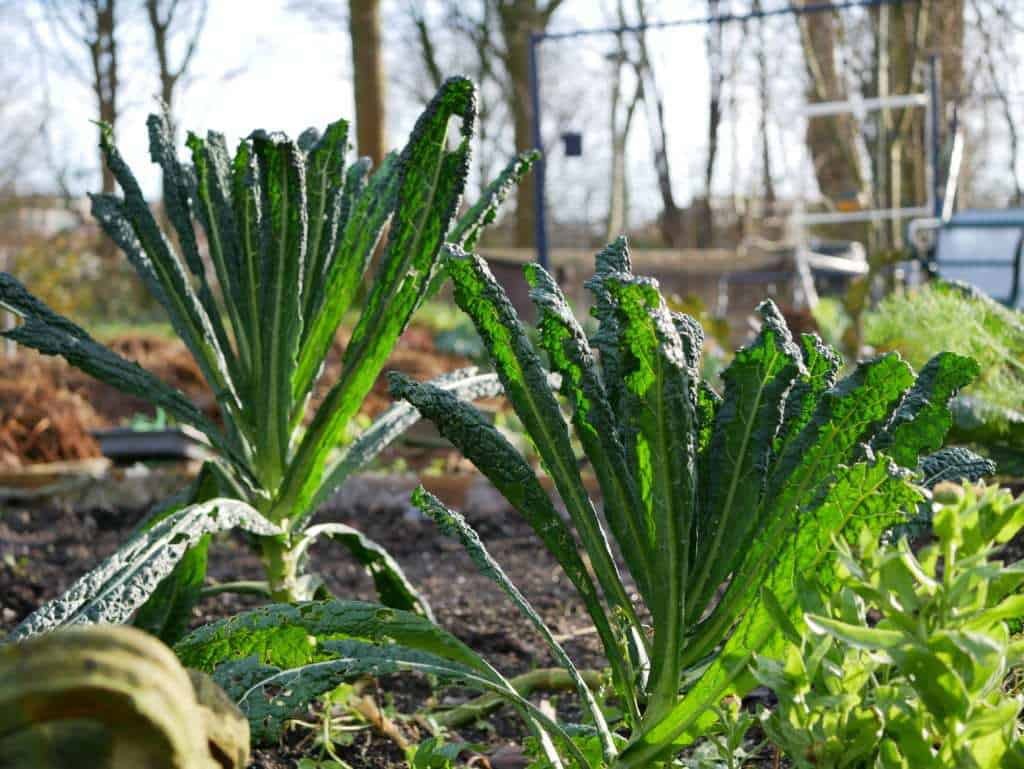
Image Source: Diana’s beautiful vegetable garden
Tuscan kale, or ‘Cavolo nero’ as the Italians call it, taught me an important lesson about patience in the garden. This stately leafy cabbage even becomes more flavorful after a frost period [50]. With its majestic dark-green leaves that reach skyward like a palm tree, this vegetable brings a touch of Tuscany to my winter vegetable garden.
Tuscan kale growing basics
Over the years I’ve found that sowing indoors from March gives the best results. My young seedlings do best in a bright, cool spot [13]. After much experimenting I now keep a planting distance of 65 x 50 cm – they really need that space for optimal development [13]. From experience I know this vegetable grows best in:
- Well-aerated soil with a slightly acidic pH
- Soil that is moist but not waterlogged
- Spots with good air circulation
- A spot with at least 4 hours of gentle sunlight
Protecting the plants with fine insect netting against whitefly and cabbage fly is a lesson I learned the hard way [13]. I’m still surprised that palm kale can get by with less feeding than its relatives [13].
Protection against caterpillars
My biggest challenge? The voracious caterpillars of cabbage whites and moths [51]. After years of gardening I check the underside of the leaves weekly for treacherous eggs [52]. A natural solution that works great for me: attracting birds with nest boxes [51].
For extra protection I stretch insect netting or fleece over the plants [53]. What I love most is how palm kale keeps growing even in mild winters, with a protective mulch layer acting like a warm winter coat [54]. Happy planting!
Fennel: Versatile Vegetable
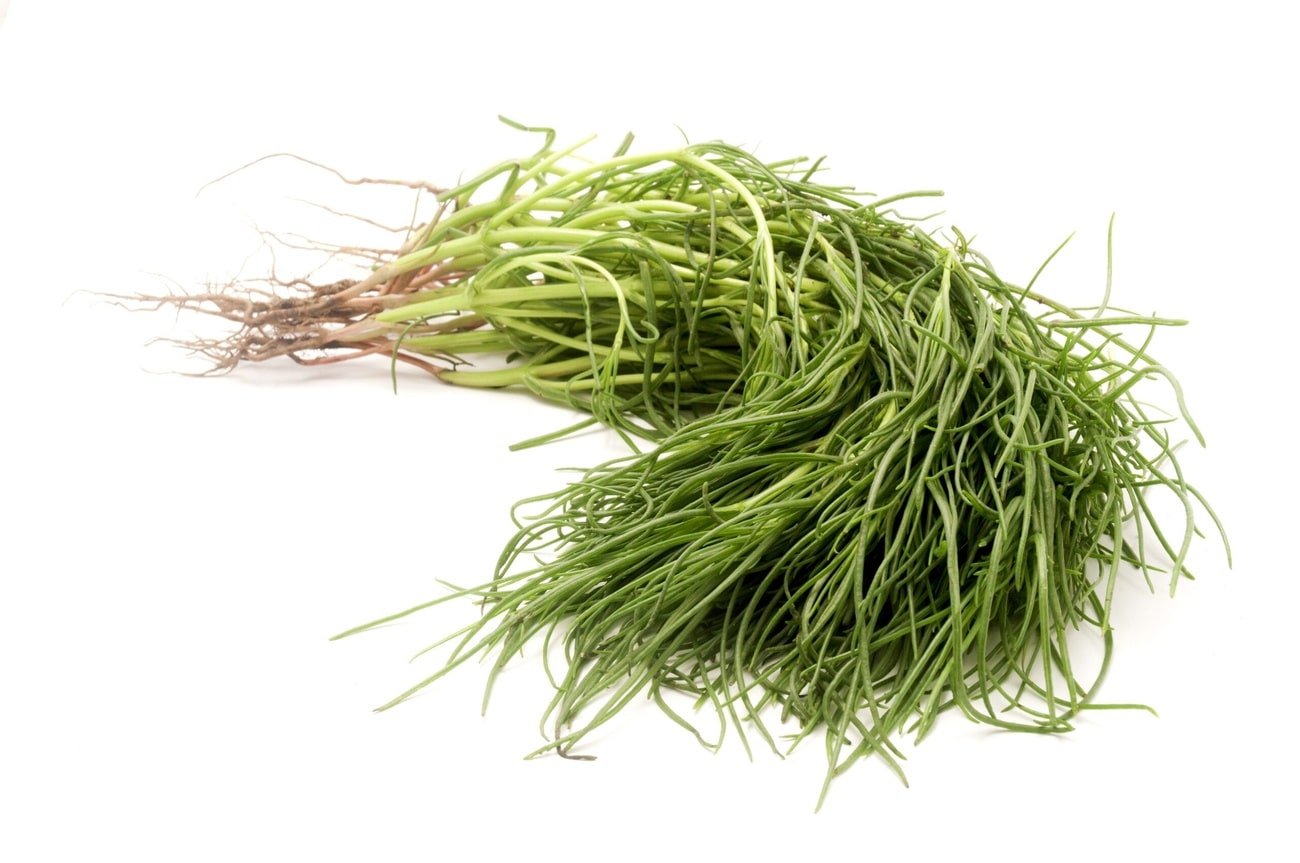
Image Source: Stadstuinieren
Fennel has stolen my heart with its refined anise-like flavor. This fascinating plant comes in two forms: bulb fennel with its tender bulb and the graceful leaf fennel for aromatic additions [1].
Growing fennel for beginners
Through trial and error I have learned that timing is everything with fennel. March proves perfect for an early harvest, while June is ideal for a late crop [1]. Sowing requires precision — the tiny seeds go half a centimeter into the soil [1]. I like to experiment with both sowing methods: directly in the open ground or first carefully in pots [55].
For a successful harvest I have found these conditions indispensable:
- A sunny or partially shaded spot where the plant can flourish
- Well-aerated soil that holds moisture
- Space of 20-30 cm between plants
- Consistent watering for optimal growth [55]
Care and harvesting tips
I’m still amazed how little maintenance fennel requires, but one thing is crucial: moisture! In dry conditions they bolt like rockets [1]. During growth I add extra potassium fertilizer — a tip that really improved my yield [55].
The harvest begins once the bulb measures about 10 centimeters [1]. With a gentle hand I pull the bulb out of the ground by its foliage, then I immediately cut off the greens [1]. The greens stay fresh for another two days in a glass of water — perfect for a herbaceous garnish [1]. The bulb itself keeps for up to three days in the refrigerator, but to be honest — fresh from the garden tastes best of all [1]. Happy planting!
Comparison table
Through my years of gardening experience I have discovered how differently vegetables can be in their care and harvest times. This table summarizes my main findings – a wealth of information I am happy to share with other gardeners.
| Vegetable | Growing/Harvest time | Sowing period | Plant spacing | Main care tips | Storage tips |
|---|---|---|---|---|---|
| Head lettuce | 8-12 weeks | Not specified | Not specified | At least 4 hours of sunlight per day, water regularly | Not specified |
| Leaf lettuce | Harvestable for up to 3 months | March through May | 30×30 cm | At least 4 hours of sunlight, water regularly | Max. 1 day in the refrigerator |
| Radishes | 4-6 weeks | March to July | 3-5 cm | Well-aerated, low-nutrient soil; water regularly | Up to 1 week in the refrigerator with water |
| Swiss chard | Harvestable until November | Not specified | 20-30 cm | Sunny/partial shade, 2-3 cm of water per week | 1-2 days in the refrigerator |
| Bush tomatoes | Not specified | Not specified | 50-80 cm high | At least 8 hours of sunlight, water at the base of the plant | Not specified |
| Potatoes | 10 weeks (early) | Not specified | 2-3 per bag (30L) | Keep moist, hill up when plants reach 15 cm | Not specified |
| Arugula | 3-4 weeks | March to October | 15 cm between rows | Well-draining soil, regular watering | A few days in the refrigerator |
| Oriental Mix | A few weeks | March to August | 20-30 cm | Adequate sunlight, cool temperature | Up to 1 week in the refrigerator |
| Zucchini | Not specified | Not specified | 50-75 cm | 6-8 hours of sunlight, harvest regularly | Not specified |
| Broad beans | Not specified | February/October | 2-3 cm deep | Minimum 5 degrees, protect against aphids | Not specified |
| Spinach | Not specified | February to April | 15 cm between rows | Loose, fine soil, adequate nutrients | In a sealed bag in the refrigerator |
| Peas | Not specified | March to April | 3-5 cm | Sturdy climbing support, protect against birds | 3-5 days in the refrigerator |
| Beets | 3-4 months | Mid April to July | 25 cm between rows | Consistently moist soil, humus-rich soil | Up to 5 months in a cool cellar |
| Kale | Not specified | From March | 65×50 cm | Cover with insect netting, light soil | Not specified |
| Fennel | Not specified | March or June | 20-30 cm | Sunny/partial shade, moist soil | Max. 3 days in the refrigerator |
I use this table as a quick reference in my garden. I am always surprised by how different growing times can be – from fast radishes to patient beets. Remember that these times can vary depending on the weather and local conditions. Happy planting!
Conclusion
After years of gardening, I’m still amazed at how accessible this hobby really is. These 15 vegetables have taught me that anyone can garden, whether you have a tiny balcony or a spacious garden. It still thrills me to see how quickly radishes and arugula grow – within a few weeks you already have your first harvest! Meanwhile, cut-and-come-again crops like leaf lettuce and chard provide me with fresh leaves for months.
Through trial and error I’ve discovered that some vegetables even thrive better in pots or bags than in open ground. Take potatoes in grow bags for example – what a surprising yield! Or look at my peas that cheerfully climb upward without taking up much space. I’m continually amazed at how kale and chard keep growing even in winter, as faithful suppliers of fresh vitamins.
The main lesson I like to share: start modestly, with a few vegetables you really enjoy. Regular sowing and harvesting will naturally become a rhythm – like a dance with your garden. Every meal with homegrown vegetables feels like a little celebration. Trust me, nothing tastes as pure and as rich as vegetables from your own garden. Happy planting!
FAQs
Q1. Which vegetables are most suitable for beginning vegetable gardeners?
For beginners, fast-growing and low-maintenance vegetables are ideal, such as radishes, lettuce, arugula, spinach and zucchini. These vegetables grow relatively quickly and require little specialized care.
Q2. How can I grow vegetables if I have limited space?
Even with limited space you can grow vegetables. Consider vertical gardening with climbing plants like peas, or use pots and bags for potatoes and tomatoes. Leafy greens such as lettuce and arugula also do well in smaller spaces.
Q3. What is the fastest vegetable to grow?
Radishes are among the fastest-growing vegetables. They can be ready to harvest within 3-4 weeks. Other fast growers are arugula, leaf lettuce and spinach, which can often be harvested within 4-6 weeks.
Q4. Which vegetables should I sow first in spring?
Early in spring you can start sowing cold-resistant vegetables such as spinach, peas, broad beans and lettuce. These vegetables tolerate lower temperatures well and give you an early start to the gardening season.
Q5. How do I protect my vegetables from pests and diseases?
Prevention is key when protecting your vegetables. Use insect netting or garden fleece to keep insects away, keep plants well ventilated to prevent fungal diseases, and practice crop rotation. For natural pest control you can also attract beneficial insects and birds to your garden.
References
[1] – https://www.mooiemoestuin.nl/groenteteelt/bladgewassen/kropsla/
[2] – https://www.vanderplanckewinkel.nl/c-3224241/sla/
[3] – https://www.rootsum.be/nl/ik-bescherm/moestuin/sla
[4] – https://www.keukenplanten.nl/zaaikalender/kropsla
[5] – https://makkelijkemoestuin.nl/kennisbank/mini-kropsla-zaaien-en-kweken
[6] – https://www.pokon.nl/tips/slakken-in-sla/
[7] – https://www.bolster.nl/hoe-moet-je-pluksla-oogsten/t24992?srsltid=AfmBOopfmrWFgKog7DR3EloB-BbxPHqoSxLXkD-UGkTbgDzj5NZDFFqQ
[8] – https://makkelijkemoestuin.nl/kennisbank/pluksla-zaaien-voor-langdurig-oogsten
[9] – https://www.mooiemoestuin.nl/groenteteelt/bladgewassen/pluksla/
[10] – https://makkelijkemoestuin.nl/kennisbank/rode-pluksla-zaaien-met-mega-resultaat
[11] – https://moesmeisje.nl/radijs-kweken-van-zaaien-tot-oogsten-stap-voor-stap-uitgelegd/
[12] – https://groei.nl/moestuin/moestuinkalender/hoe-zaai-ik-radijs
[13] – https://www.mooiemoestuin.nl/groenteteelt/bladgewassen/snijbiet/
[14] – https://etenuitdevolkstuin.nl/groente/snijbiet/
[15] – https://www.compo.be/nl/advies/planten/kruiden-groenten-fruit/snijbiet
[16] – https://depeerdegaerdt.nl/snijbiet-kweken/
[17] – https://www.ivn.nl/aanbod/moestuinieren/leren-over-de-natuur/kweektips-snijbiet/
[18] – https://makkelijkemoestuin.nl/kennisbank/balkontomaat-zaaien-en-kweken
[19] – https://undergreen.nl/kitchenpassion/tomatenplanten-verzorgen/
[20] – https://www.lovethegarden.com/be-nl/kweekgids/tomaten-planten
[21] – https://makkelijkemoestuin.nl/kennisbank/gele-struiktomaat-zaaien-en-kweken
[22] – https://www.semaille.com/nl/tips-voor-een-succesvolle-teelt/1916-succes-met-je-tomaat-ons-advies.html
[23] – https://www.tuinenbalkon.nl/aardappelen-in-zak-kweken
[24] – https://plukkers.com/blogs/news/aardappelen-kweken?srsltid=AfmBOopsULifSZr0W3_HAf62e3dciona5dGpZ7FEiF629m_nilOCY_xj
[25] – https://www.gardenersworldmagazine.nl/groene-school/moestuin/aardappelen-kweken-in-een-zak/
[26] – https://www.baldur-nederland.nl/onion/content/plant–und-verzorgingstips/groente-und-kruiden/aardappelen-kweekzak?srsltid=AfmBOooZBfH41oaDJ-hSABsn6c1cxpCsEcSOSTeLMvcr_RviwuUxP0x_
[27] – https://plukkers.com/blogs/news/aardappelen-kweken?srsltid=AfmBOopsn4qCwUSut0-7BBS9M9Ke5XsCrTscC4SU5jmLSI_YVSoNz2E1
[28] – https://dcm-info.be/nl/hobby/tuintips/aardappelen-planten-aanaarden-en-bemesten-in-de-moestuin
[29] – https://www.maxvandaag.nl/sessies/themas/huis-tuin-hobby/hoe-en-wanneer-aardappelen-kweken-en-voorkiemen/
[30] – https://stadstuinieren.nl/artikel/aardappelen-kweken/?srsltid=AfmBOopf8Kj0-6mPQ4ZokqTI5AxTHzCIQK5WrflRJwKsMDcwrU2CSnO8
[31] – https://buitenleven.nl/vijf-makkelijke-groenten-om-zelf-te-kweken/
[32] – 5 easy leafy greens to grow yourself
[33] – How to grow arugula (rocket)
[34] – Gardening tips
[35] – Rocket lettuce (arugula)
[36] – Harvesting arugula
[37] – Sowing arugula
[38] – Sowing and growing Asian cut-and-come-again lettuce
[39] – Growing Asian leafy vegetables – our tips
[40] – Easy vegetables for beginners
[41] – Lettuce Oriental Greens Mix
[42] – Growing courgettes (zucchini) — our tips
[43] – Courgettes in all shapes and sizes
[44] – Growing courgettes: from sowing to harvest
[45] – Broad beans — tips for sowing, planting and harvesting
[46] – Broad bean
[47] – Broad beans — black bean aphid
[48] – These are real vitamin bombs
[49] – Spinach
[50] – Peas: sowing and growing
[51] – Growing pods — our tips
[52] – Growing pods — our tips
[53] – 7 vegetables for a vertical garden
[54] – Peas (legumes)
[55] – When to harvest beans and pods
[56] – Beetroot
[57] – Red beetroot
[58] – Chioggia beets: sowing and growing
[59] – https://www.bolster.nl/bieten-telen-onze-tips/t21807?srsltid=AfmBOoqBZoDsdap8-DGc54WeBAiXclEQcPxBf7YIHd0RSo1JaCE09HsF
[60] – https://www.gezondemoestuin.nl/rode-biet-kweken/
[61] – https://plukkers.com/blogs/news/rode-biet-kweken?srsltid=AfmBOooXPtlCNQD63FwzOUa1zbZFH1OrmerBZcQmcsdGFL3xflp4gV-s
[62] – https://www.bolster.nl/bieten-telen-onze-tips/t21807?srsltid=AfmBOopW_Y3AMmq-MOX_5w6S5JMuWZdo_Vts-2-7XuRAv9bTL1-jg6-Q
[63] – https://sprinklr.co/blogs/tuinplanten-verzorging/rode-biet
[64] – https://makkelijkemoestuin.nl/kennisbank/welke-groentes-kunnen-tegen-kou
[65] – https://www.bolster.nl/palmkool-telen-onze-tips/t21698?srsltid=AfmBOorQ-2gyoUZ4DM7gTf8EwwIAjWC6OQCoD0wiJKNUDJ2k60JSeqIL
[66] – https://velt.nu/tip/wat-doe-je-tegen-rupsen-op-koolplanten
[67] – https://community.makkelijkemoestuin.nl/posts/vragen/koolwitjes-ravage-op-mijn-palmkool-en-boerenkool
[68] – https://www.compo.be/nl/advies/plantenverzorging/groenten-fruit-kruiden/wintergroenten
[69] – https://moesmeisje.nl/palmkool-zaaien/
[70] – https://groei.nl/moestuin/groente/hoe-kweek-ik-knolvenkel
[71] – https://www.dutchgardenseeds.com/kruiden-kweken/venkel-zaaien-en-kweken/?srsltid=AfmBOooAk5p21ONobSd6cTnjwVCPR6uNW_TQCPwxmsHD3mrnp1QbYv_p